Friday 26 July 2013

Patchwork Scottie Dog - Tutorial

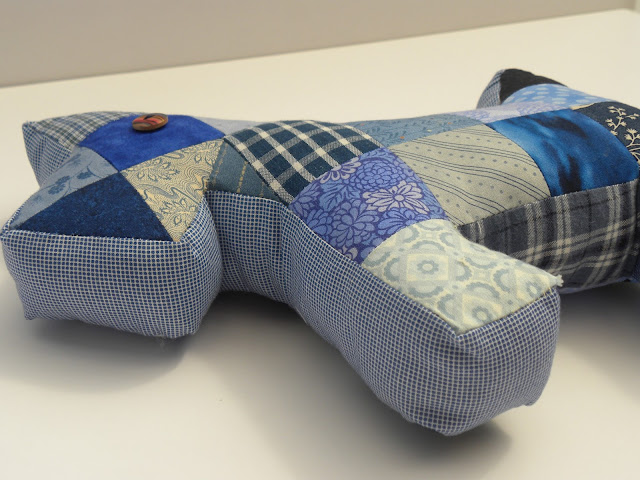
Its been a long time since I finished the Patchwork Scottie Dog for my son, I promised then to share a pattern for the design I made and here it is - my Patchwork Scottie Dog Tutorial

I do love Patchwork Scottie Dogs, I'm not sure where I first saw these, but fell in love with their little personalities. Each one so colourful. Each one just wanting a hug

(Images from Google)

I wanted to make one immediately but want mine to be a bit different. These are cute but I wanted some extra personality, I wanted him to look like he's up to mischief...so I changed the design slightly. 

Hope you like my little friend, here is how to make him...enjoy


Patchwork Scottie Dog


You will need
22 patchwork squares measuring 2.5" x 2.5"
10 patchwork triangles (half 2.5" square)
2 patchwork mini triangles (quarter 2.5" square)
Fabric strip measuring 2.5" x 50"
2 buttons for eyes
Toy stuffing

1. Layout your fabric
I like to have a good mix of fabrics on each side of the dog and don't repeat, but you can really do any pattern you like, diagonal strips would work well.
You need to place your squares in the following shapes


Patchwork Scottie Dog Pattern


2. Stitch your blocks together to form the 2 sides
As with all patchwork leave 1/4" seam allowance

3. Button eye
Position and stitch on the button eye

You will now have 2 lovely 2D patchwork scottie dogs and can see the dog forming....now to make him 3D

4. Stitching the fabric strip to the patchwork side
Use a quick tacking stitch to mark 1" from one end of the fabric strip.
Use this 1" tacking as the place to start stitching the fabric to the patchwork body.
Starting behind the front legs of one of the patchwork sides, pin and stitch the side and fabric strip together (right sides together and leaving 1/4" seam allowance)

Patchwork Scottie Dog Pattern


Move from the front legs towards the head stitching as you go

Leave a 1" gap between the start and end of stitching

5. Repeat with the other patchwork side
Using the tacking line as your guide start stitching behind the front legs of the other patchwork side and repeat stitching around the body towards the head remembering to leave the 1" gap between starting and finishing stitching

6. Turning the down out
Trim the seams at the corners and turn the dog the right way out poking out all the pointy bits at the tail and ears

7. Finishing Up
Remove the tacking
Stuff the toy
slip stitch the opening behind the front legs closed trimming off or tucking in any excess fabric

Patchwork Scottie Dog

Enjoy your new toy

Do let me know if you make one of these dogs, I'd love to see what you create

thanks
x


Thursday 25 July 2013

#declutterday week2

You may remember that last week I launched #declutterday

Becca Lou Creates


This was a joint effort with Catherine at Baby Genie; we pledged to support each other to clear out the clutter, we committed to removing at least 5 items each week.

I'm not a major hoarder, and I'm not looking to go minimalist, I just want a nice tidy home. Basically I have too much stuff

Progress this week
This week my clear has been a bit random, I'm not pleased with my performance to be honest, week 2 has been disappointing. My decluttering of random items which I've grabbed and decided to get rid it wasnt the clearing of a cupboard or draw leaving it sparkling and ordered which I'd been dreaming of. But it was progress none the less and therefore shouldnt be knocked too hard.

My home has been cleared of the following;

- a free magazine gift eye liner (I do my makeup on the train on way to work....I give eye liner a miss panda doesnt look good on me!)
- an osteopath cushion which never really worked for me and has been sat in the corner of the living room for too long
- some clothes bits nothing to write home about really
- some business books

Not a bad decluttering and well over the 5 item target, but I'm a bit disappointed at my random attack....this week my report reads

Must try harder

But.... I have made progress towards our holiday trip to Disney in January still a long way to go.


Have you managed any decluttering this week? How are you getting on? Have you got any tips for me to try in tackling my home?


Monday 22 July 2013

Embroidered Sampler Shopping Bag

Like most people I try to recycle as much of our household waste as possible and remember to take my own bags shopping about 90% of the time. Whilst sorting out my craft desk this week I found this bag folded in with some quilting material - I made this last year its a sampler / shopping bag, took me quite a while to do as embroidery always does.

Embroidered Sampler Shopping Bag


The problem is I'm way to scared to actually use it. It's been sat on my craft desk for over a year and I've been using the hardy plastic bags you can get at the supermarket, I really need to get this out.


Embroidered Sampler Shopping Bag


Think it will look really cute with a french baguette sticking out of the top....right that is my mission to get a photo of my using it to share with you 

Sunday 21 July 2013

Art Finder Giveaway and new blog design

Hopefully you've spotted that the decorators have been in and left me with a wonderful new blog design, I'm loving it, isn't it pretty, I'd love to take the credit, but it was developed by the wonderfully talented Faye Kent (there is a link at the bottom of the page if you are interested)

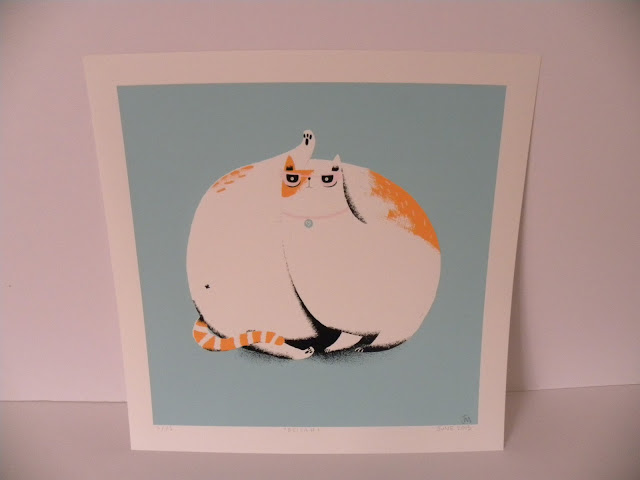
Anyway to celebrate this new look Art Finder have kindly given me this wonderful print to give away

Awesome!!


Here’s a little about them….

 - They sell affordable art online directly from artists and independent galleries
 - They have over 6,000 artworks from 36 countries
 - They sell original art & limited edition prints (numbered and signed by the artist)
 - They offer artists a platform to showcase their work internationally without needing to be represented by a gallery. For many artists this means the difference between making a career out of being an artist or doing a different job. 
Their mission is to enable everyone to enjoy art, by making it more accessible and affordable. They have limited edition prints from as little as £15 and oil paintings from £75 upwards


So they have given me this fabulous limited edition print by Jason Munro, its 35cm x 35cm and is valued at £40


Jason Munro Limited Edition Print

Jason Munro Limited Edition Print


It could be winging its way to you shortly. 

All I ask if that you follow me on bloglovin and leave me a comment here on this blog to tell me you have done that and for an extra chance to win follow me on facebook and leave me a comment there too.

I'll add all the comments together and pick a winner

International entries are welcome, I'll post this anywhere, and the closing date is Midnight Wednesday 31st July 

Good Luck
xx

Friday 19 July 2013

Hexagon Patchwork iPad Mini Case Tutorial

My Mum recently bought herself an iPad mini, think she was feeling left out as Me, Hubby and Dad all had one and she wanted to know what all the fuss was about. Well a couple of months in and she is completely addicted and asked me to make her a case so it could go everywhere with her. I'm loving Hexagon Patchwork at the moment so set about making an iPad Mini case using the paper piecing technique

Hexagon Patchwork iPad Mini Case

I always find estimating the final measurements of a hexagon patchwork a bit mysterious, so thought I'd share this method with you so you can make one knowing it will fit, this is snug on the iPad Mini with the Apple Smart Case on the front. If you had a bigger case I would propose making the hexagons slightly larger.

You will need

  • 2 1/8" or 5.5cm Hexagon Template - I used the smaller pink template from this clover pack patchwork templates pack
  • Cotton patchwork fabric to make 27 hexagons
  • Batting
  • Cotton to line
  • 1 button
  • a small piece of ribbon

How to...

1. Start by cutting 27 paper hexagons using the inside of the template, and 27 fabric hexagons using the outside of the template. Folding the fabric over the edge of the paper template create 27 paper pieced hexagons 

Stack of modern fabric patchwork hexagons

fabric patchwork hexies


2. Lay your hexagons out in a rough pattern and stitch together into a final shape as below - 4 rows of 6 and 1 row of 3

Then to create the pocket for the iPad fold in half and stitch the edges together from A to B keeping the right sides together 

fabric patchwork hexies ready to stitch into iPad Case


You will get a tube like structure open at both ends with the 3 hexagons on the bottom row not yet stitched closed

iPad Mini case - Patchwork


3. To create the bottom of the case fold the 3 hexagons in half stitching the sides to themselves and the zig zag edge to the other side of the tube 


iPad Mini case - Patchwork

 
iPad Mini case - Patchwork


4. Now remove all the paper and tacking stitches, this is my favourite part of the process as you are almost finished and it feels like you are removing the workings to reveal the finished item.

Turn the case right side out making sure you push out the bottom corners so they are sharp. 


Nearly there now....


5. Making the lining. Measure your case, mine was 6 1/4 " wide by 8 1/2" long. 

Measure lining and batting to be 1/4 narrower and 2 x length + 1" longer  - mine was 6" x 18"

Place the lining fabric on top of the batting and fold length ways  so the lining is right sides together inside a batting sandwich. Stitch the sides close to the edge (give your fingers a rest and whizz this on the sewing machine!)

iPad case lining


5. Wriggle your lining inside the hexagon patchwork outer shell and poke right into the corners

Attach a button to the front of the case and a ribbon to the batting in the back (the stitching will be hidden when the case is stitched closed if you attach to the batting). The ribbon will act as a loop to close the case and secure your iPad inside. 

6. Trim the batting to the the exact same size as the outer shell and trim the lining to be approximately 1/4" longer.

Patchwork iPad Case


Now for the final step... 

7. Fold the lining over the batting and stitch to the edge of the hexagon patchwork outer case, folding over at the peaks and snipping into the troughs so you get a sharp neat finish

Hexies Patchwork iPad Case

Hexies Patchwork iPad Mini Case


Well Done - You have made your own hexagon patchwork iPad mini case.

Do let me know if you use this tutorial to make one for yourself, I'd love to see your creations

Thanks x


Thursday 18 July 2013

Launch of #declutterday

You know the old saying "a problem shared is a problem halved"? well I had a moment which proved this earlier in the week. I was reading through the blogs I love on Bloglovin when I can across Catherine's post for Baby Genie about clutter getting her down. I felt the same. On Thursday evening we started exchanging comments on her blog about the fact we really must do something about this and bam....#declutterday was created. 

Don't get me wrong I'm not about to be featured on the hoarder next door, but this house is just full of too much stuff. Exactly a year ago we moved from our large 3-bed to a larger 4-bed house, I thought there would be plenty of space to house all our belongings but no, we are already creaking at the seams. Something has to change.

I think we all know the liberating feeling of packing light for your holiday and surviving quite happily for a week with only 2 pairs of short and a couple of t-shirts. If feels great, you don't feel weighed down by stuff and there are only simple choices to be made. This versus packing half your wardrobe and realising at the end of the week you haven't worn half the things you dragged halfway across the world thinking they were "essential" to a happy holiday. I'm always left feeling a little cross with my indulgent self in this scenario.

Well I want to get to the 2 pairs of shorts life style, and you are here to help me do it, I want you to work with me to declutter my house and in the process give me that liberating free feeling of a clear mind.

Clear House = Clear Mind

But I also want to make my decluttering pay... There is no doubt that clearing the clutter is my primary aim, but I do like a target to work to. To that end I thought I would see if I can fund the accommodation of our mega-huge-massive holiday to Disney through this decluttering and selling some of the items I no longer need. This means I need to make £950 in 6 months, eek

Clear home and a few extra pennies in the bank...wonderful news

Would you like to join Catherine and I in our quest for clear homes and a healthier bank balance? 

So the rules of #declutterday
  1. remove at least 5 items of clutter a week - these can be too the charity shop, eBay or the bin - it doesn't matter so long as the items are no longer in your home
  2. share your success - using the #declutterday tag on blogs, twitter and instagram
  3. grab the button below to let people know you are taking part and are aiming for a decluttered home
  4. no new clutter - i think this is going to be the hardest rule but it really is vital - no new non-esssential items to be purchased
So I will blog each Thursday about the items I've removed from my home I hope to eventually move to a clear home, and meet my target of funding part of our Disney trip by revealing Mickey Mouse as I go with the amount I've made from sales of stuff I no longer need

Why don't you join us? 


 Grab the button below for your blog and share your progress, leave me a comment to let me know you are taking part in #declutterday and I'll pop over to your blog to cheer you along. Good Luck!


Becca Lou Creates


Progress in week 1
I've got off to a mixed start this week

Charity - I took 3 large bags of clothes and home accessories including pictures and cushions to the charity shop this week, I cannot claim too much pride in this as the work to sort out these items had been done a long time ago, the bags were just sat in the garage waiting for a car ride...but now they have gone, hoorah!

eBay - a successful eBay week too - clothes and DVDs have been my focus, this week I've made £25.58, but I bought Suits Season 2 on eBay for £11.51, (I hope to sell this on when we have watched it so hope not to cost too much in the long run, I suppose it isnt really essential so you will have to forgive me).

So my running total is £14.07


My Mickey Reveal 
Looking rather pathetic after week 1


there is a long way to go.....

Wednesday 17 July 2013

WIP Wednesday - Bleach Shoe Art

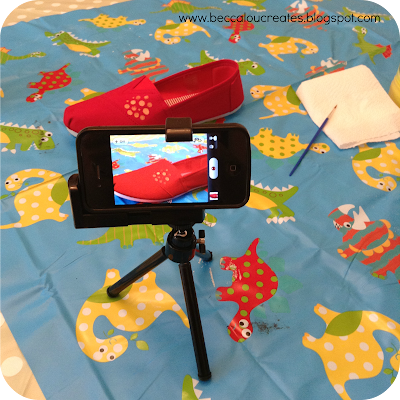
Making cheap shoes fab.... Post coming soon

Bleach Shoe Art

Monday 15 July 2013

Vegetarian Step-by-step - Book Review

I've mentioned before that I'm trying to find crafts that I can involve my son in at the tender age of 2.5yrs. We have recently started growing our own veg, and planting seeds but on a drizzly day we do love to cook (and eat) so when Parragon Books offered to send me Vegetarian Step-by-Step recipe book to review I replied "yes, please".


Recipe book, vegetarian recipe book

In fact when I saw the book I said "yes, yes, yes, finally!"

This was no ordinary recipe book

It's the best child cook along recipe book I've ever seen (and no Parragon haven't asked me to say this!) and its actually not a children's recipe book.


So what's so special?

recipe book, vegetarian

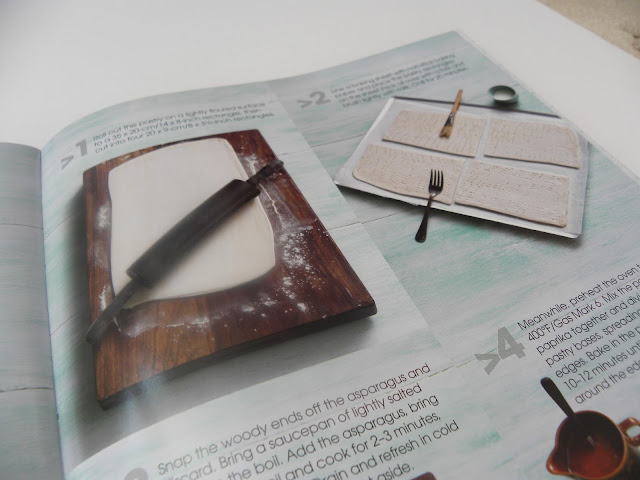
The layout of Vegetarian Step-by-step is heavily pictorial. Whilst the steps are written out like a normal recipe book there is a photo of each stage as well. This was pure genius for cooking with little ones as you can discuss the pictures together and follow them.

The recipes aren't particularly simple, but the pictures meant that me and my 2.5yr old helper made the asparagus and egg pastries with no trauma, and he was confident to get involved as we could just look at the picture together to complete the next step
  • There was no need for me to practically memorise the recipe before we started so I knew exactly what was coming next - because I could quickly look at the pictures
  • There was no concern as to whether we were doing the stage correctly - because we could look at the recipe in pictures
  • There was no reading the same instructions 3 times because you've lost your place in the recipe - because we knew which picture we are working on
Checking against the picture we've got all the ingredients ready

Pricking the pastry

Snapping the asparagus - tough work

Ready for the oven

I was left thinking
why aren't all recipe books like this?

The food was really tasty too, all enjoyed the delicious homemade lunch


The target market for Vegetarian Step-by-step is most definitely adults, but if your child loves to cook with you this is a great option. A quick amazon search tells me there are more in the series including Tapas, Cocktails and Beginners might have put one of these on my list for Santa


I was sent Vegetarian Step-by-step by Parragon to review, no money exchanged hands. All the words in this post are my own

Friday 12 July 2013

#PostCircle - My first Letter

A few months ago I read a post somewhere on the blogosphere about a blogger who was organising a #PostCircle, a group of people who have nothing more in common than they have signed up to take part and who agree to send each other a little letter or a post card every now and then to say "Hi" 

Everyone loves receiving post

Anna at Miss Beatrix was organising the #PostCircle and last week I received a list of 5 other lovely ladies who were in my group. They are just names on an email at the moment but I'm really looking forward to getting to know them and sending them little surprises now and then. 

I eagerly sent off my first letter last week and have been awaiting my first letter in the post....it arrived this morning 

Was so excited to open it, but resisted to take some photos first (very difficult not to just rip it open)

Stunning calligraphy and decorations on front of envelope 

 Washi tape and sticker back of envelope


Isn't it beautiful - real thought and care has gone into this, so lovely

My letter was from Lisa at The Glue Gun Girl - check out her blog, she has some fabulous items and has recently posted a really cool tutorial to make your own envelope.

Not only was the envelope decorated but Lisa had clearly made the lovely card and included a little present of Washi tape and stickers...

Handmade card

A little treat for me

Feeling pretty special right now

thank you 
x


Thursday 11 July 2013

Visiting Orlando - Becca on film!

Oh yes we are off to Orlando and I am honestly struggling to contain my excitement. 3 generations are going to be taking Orlando by storm in January 2014. It's a long time to wait when you are in your 30s, but it must seem like a lifetime when you are a toddler, we keep telling my son that we are going to see Mickey Mouse after Christmas, and seen as he knows that Christmas is after his birthday (October), and his birthday is after my birthday (August) it is just a long string of excitement in his future.


I'm looking forward to meeting Mickey and the team, seeing the new Antarctica exhibit at Sea World and visiting Harry Potter in Universal. I think I might mutate into a 3 year old for the 2 weeks we are there. 

At Britmums Live last month Visit Orlando had a stand - I got the opportunity to "experience" Orlando from a conference centre in London.

I expect Academy Awards team to be on the phone soon given this rather wonderful acting performance (I'm not going to be giving up the day job, it was hysterical to make!)


I know January is a few months away but I have started to plan and have created a Pinterest Board, follow my board and see all the great activities we are planning

Can you help me plan my trip? we are going for 2 weeks, what are your absolute must do's in Orlando?

Tuesday 9 July 2013

The Amazings - Free Online Course Offer

If you've been reading my blog for a while you will know that I do love to learn new skills. I really enjoy attending courses as feel that there is so much more I can learn from a professional teacher than surfing the internet and learning from pictures. But, I don't always have the time to attend a course, there's work commitments, home commitments as well as babysitter needs, so I don't go to as many as I would like these days. So when I was contacted by The Amazings I jumped at the opportunity to take one of their online courses. You mean I can take a professional course from the comfort of my own sofa at a time which worked for me?....genius....yes please 


The Amazings Heirloom Patchwork Quilt Class
This is the Virginia the course teacher showing off her quilt


The class is divided into 9 chapter videos comprising
  • introduction explaining the technique, end product and the materials needed lasting approx 20 mins
  • the process is then split into 8 bite size chunks of approx 7 minutes 
Each of the videos is done in a chatty style, it really feels like you are also sat in Virginia's living room with Jen learning all about the techniques. I found that I watched the first couple of videos and learnt about the template fabric cutting, then I proceeded in getting my fabric and paper cut whilst I watched the remaining videos, for me this worked really well as I was able to see what was coming, and of course because it is online I was able to rewind and re-watch if I missed a bit (you cant do that in a physical class when you've been daydreaming for a second and missed the important point!)


Each of the videos was really clear and because the chapters are only 7 minutes long it's achievable and you can watch the section as you need it without worrying that you will have forgotten what the teacher said by the time you get home.  

I don't think there is a substitute for attending a physical class, but if live is busy, finances tight or taking a day to travel to a class simply isn't an option this is a brilliant alternative. 

I was offered the course free by The Amazings' team in exchange for writing this review, the team are superstars as they are also offering you lovely readers the chance to take one of their online courses free too 

Free The Amazings Online Course - Click here


what will you choose? Loom knitting? Make your own beauty products? Upcycle a shirt into a dress? There are some great classes available and remember you can take one for FREE - awesome


Friday 5 July 2013

Cupcake Pincushion

I was a lucky to receive a craft kit from my Mum recently as a little treat. Its sat on my shelf for a couple of weeks until a had a couple of free evenings to focus on this, and I was thrilled that this was all it took - 2 evenings of stitching in front of the TV and pow - 2 gorgeous cupcake pincushions to adorn my craft table.

Aren't they adorable...
Crafty Nana Cupcake pincushion

The kit had everything you needed to create these 2 pincushions, in fact it had more than needed as I'm left with loads of stuffing and thread for another project. The felt pieces were pre-cut to size plus really clear picture instructions which meant I was guaranteed a great outcome from these 

Crafty Nana Cupcake pincushion kit


Crafty Nana Cupcake pincushion


Wednesday 3 July 2013

WIP Wednesday - Cupcake Pincushion

Icing pinned and ready for stitching this evening. Making 2 cupcake pincushions from a Crafty Nana kit

Good enough to eat...


Monday 1 July 2013

Improved Cathedral Circle Quilt

After a weekend at Britmums Live and then a week on holiday I've had some withdrawal symptoms from not stitching or hooking something. I took this week off as holiday too, hubby is back at work and my son is in nursery so I have 5 days to myself *bliss*. I finally managed to finish the cathedral circle quilt I shared with you here, I originally made it 3 x 3 but when I saw it is didnt look quite right so I've added on 1 more row so its 4 x 3. Much happier with it now

Cathedral Circle Quilt


Must leave it alone now it is finished and stop fiddling! 

The home for this quilt is still being redecorated, will share the final resting place shortly