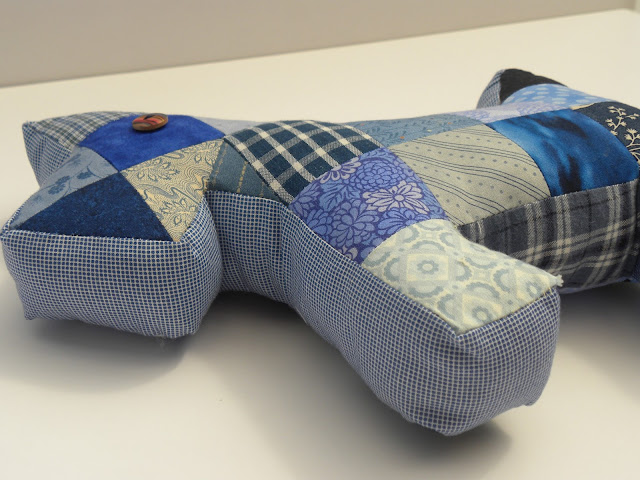
I do love Patchwork Scottie Dogs, I'm not sure where I first saw these, but fell in love with their little personalities. Each one so colourful. Each one just wanting a hug
(Images from Google)
I wanted to make one immediately but want mine to be a bit different. These are cute but I wanted some extra personality, I wanted him to look like he's up to mischief...so I changed the design slightly.
Hope you like my little friend, here is how to make him...enjoy
You will need
22 patchwork squares measuring 2.5" x 2.5"
10 patchwork triangles (half 2.5" square)
2 patchwork mini triangles (quarter 2.5" square)
2 patchwork mini triangles (quarter 2.5" square)
Fabric strip measuring 2.5" x 50"
2 buttons for eyes
Toy stuffing
1. Layout your fabric
I like to have a good mix of fabrics on each side of the dog and don't repeat, but you can really do any pattern you like, diagonal strips would work well.
You need to place your squares in the following shapes
2. Stitch your blocks together to form the 2 sides
As with all patchwork leave 1/4" seam allowance
3. Button eye
Position and stitch on the button eye
You will now have 2 lovely 2D patchwork scottie dogs and can see the dog forming....now to make him 3D
4. Stitching the fabric strip to the patchwork side
Use a quick tacking stitch to mark 1" from one end of the fabric strip.
Use this 1" tacking as the place to start stitching the fabric to the patchwork body.
Starting behind the front legs of one of the patchwork sides, pin and stitch the side and fabric strip together (right sides together and leaving 1/4" seam allowance)
Move from the front legs towards the head stitching as you go
Leave a 1" gap between the start and end of stitching
5. Repeat with the other patchwork side
Using the tacking line as your guide start stitching behind the front legs of the other patchwork side and repeat stitching around the body towards the head remembering to leave the 1" gap between starting and finishing stitching
6. Turning the down out
Trim the seams at the corners and turn the dog the right way out poking out all the pointy bits at the tail and ears
7. Finishing Up
Remove the tacking
Stuff the toy
slip stitch the opening behind the front legs closed trimming off or tucking in any excess fabric
Enjoy your new toy
Do let me know if you make one of these dogs, I'd love to see what you create
thanks
x


So, so cute. I love a little scotty dog. Great job.
ReplyDeleteMy little cousin will love one!!
ReplyDeletevery sweet!!
ReplyDeletei used the scotty dog pattern for making squares for a baby quilt - it turned out great too!
xo
eva
Very Cute - hard to resist making one!
ReplyDeleteLoved your scottie dog would make a great door stop
ReplyDelete